Nodeshift - Deploying Node Applications to Openshift
Recently I’ve been playing around with Openshift, specifically Minishift since I am running things locally. I wanted to see what the story for Node.js applications was. I’m not going to go into how to setup minishift, but here is a link: https://docs.openshift.org/latest/minishift/getting-started/installing.html
I’m running macOS Sierra, so used homebrew to do the install and I chose to use Virtual Box as my Hyper Visor. I believe this is what i did for my configuration:
$ minishift config set vm-driver virtualbox
$ minishift config set memory 6000
$ minishift start
I’ve previously written a post on Dockering your Node.js Apps. If you haven’t read it yet, i would, it’s pretty riveting stuff and sort of relates to this.
The Beginning
Before I get into the Node.js stuff, let me back up and give a little history on how why i started to look at this.
A couple of months ago, I was helping out the Openshift.io project testing out some of their stuff. Specifically the Boosters. These are small example projects that are easy to get started with the openshift.io platform. While testing, i was also keeping in mind how Node will eventually fit into this.
So, I focused on the Wildfly-swarm booster mostly, which is located here: https://github.com/wildfly-swarm-openshiftio-boosters/wfswarm-rest-http
Of course since this is a Java project you will need to have all those Java shennanigans installed, like Maven
Then to run this on my local cluster(local cluster means running on Openshift, which is really minishift, which is running locally), The directions say to use this command:
$ mvn clean fabric8:deploy -Popenshift -DskipTests=true
The thing to notice here is the fabric8:deploy, This is the plugin that does some magic to get your application ready then deploys it to openshift.
Here is what it looks like once it has been deployed:
and here is what the actuall application looks like:
I thought this plugin would be a good place to start on learning how to deploy node applications to Openshift. I’ve had limited experince with deploying to Openshift, so i wasn’t totally sure the flow of things.
Looking a little deeper at the java code(yuck), i realized, they are just hitting REST endpoints.
Nodeshift was then born. Well, technically, First came the Openshift Rest Client and then the Openshift Config Loader
The idea was to try to reverse engineer what that maven plugin was doing and create a P.O.C.
Using Nodeshift
Lets take this simple express application located here: https://github.com/bucharest-gold/nodejs-rest-http
It has one REST endpoint that is exposed, /api/greeting
Nodeshift has been added to this project already, and I’ve also setup a npm script called openshift that will run the nodeshift command.
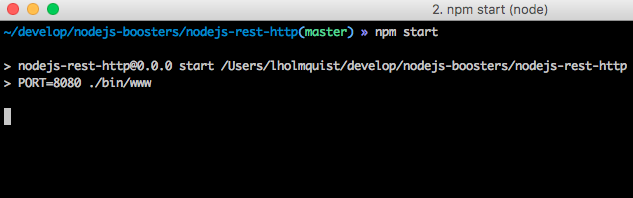
We can run this app locally, just to make sure nothing is broken. From the command line type(assuming you’ve already done the npm install):
$ npm start
You should see something similiar in your console:
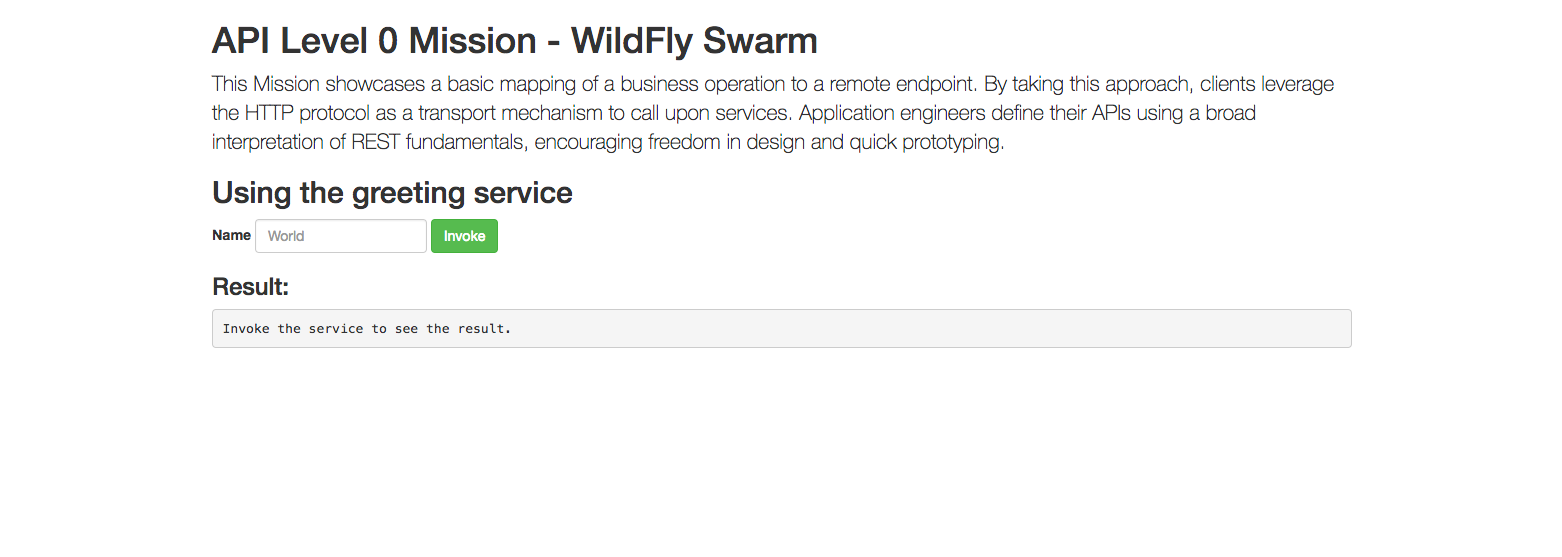
Going to http://localhost:8080 , you should see a similar UI:
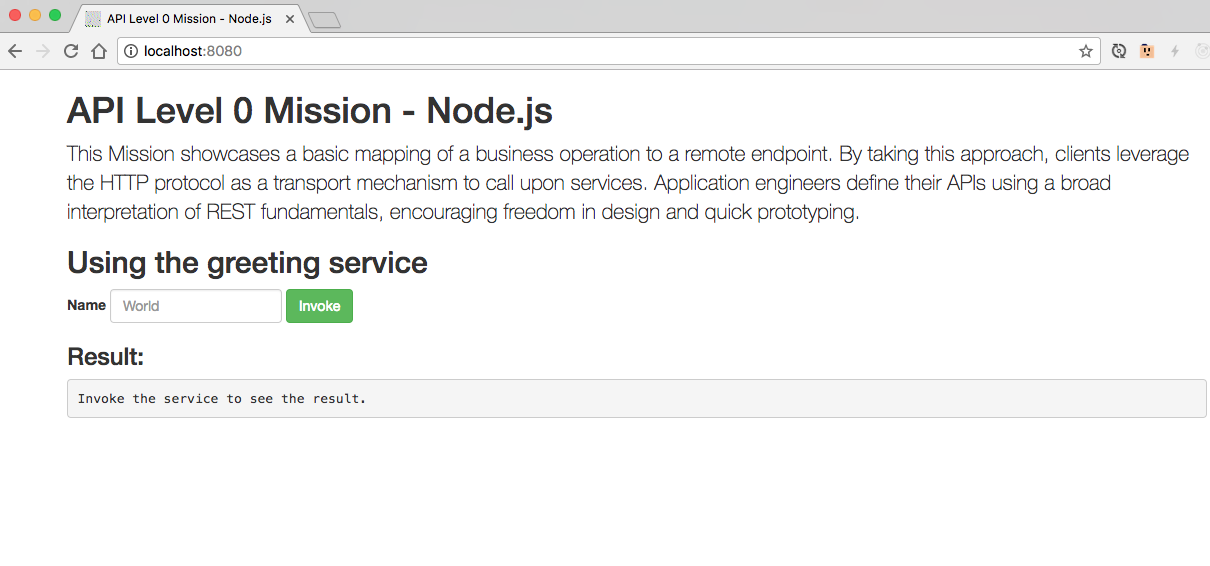
It should look familar to the Wildfly Swarm example from earlier, since all i did was copy and paste the HTML to the nodejs app.
Now that we now what we should be expecting, lets see how we can use nodehift to get this running on our local Openshift cluster.
Step 0 - Pre-reqs
Before we begin, make sure minishift is up and running and the oc command line tools are installed.
Step 1 - Login In and Set Project
First step, We need to login to minishift(This is just our local Openshift). Use the oc command login like this:
$ oc login -u developer
The password will also be developer.
Lets also create a new Project to run our app in. You also do this with the oc commands
$ oc new-project node-demo
Step 2 - Run Nodeshift
The next step is to run our openshift npm script:
$ npm run openshift
If everything is successful, you will see something similar in your console:
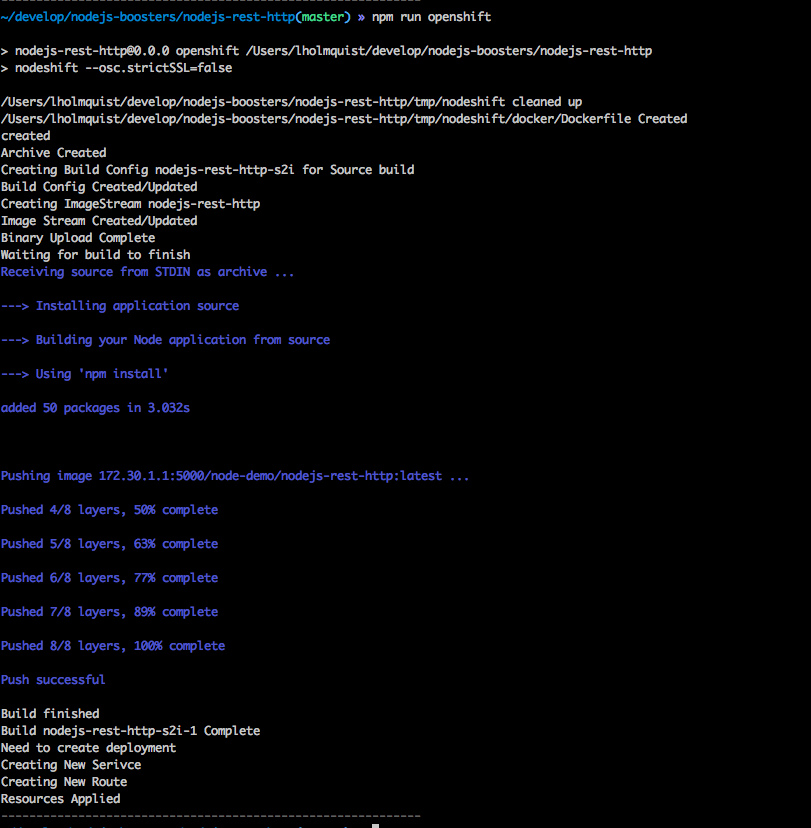
note: That blueish-purpleish output is actually the docker build logs from the Openshift clutser.
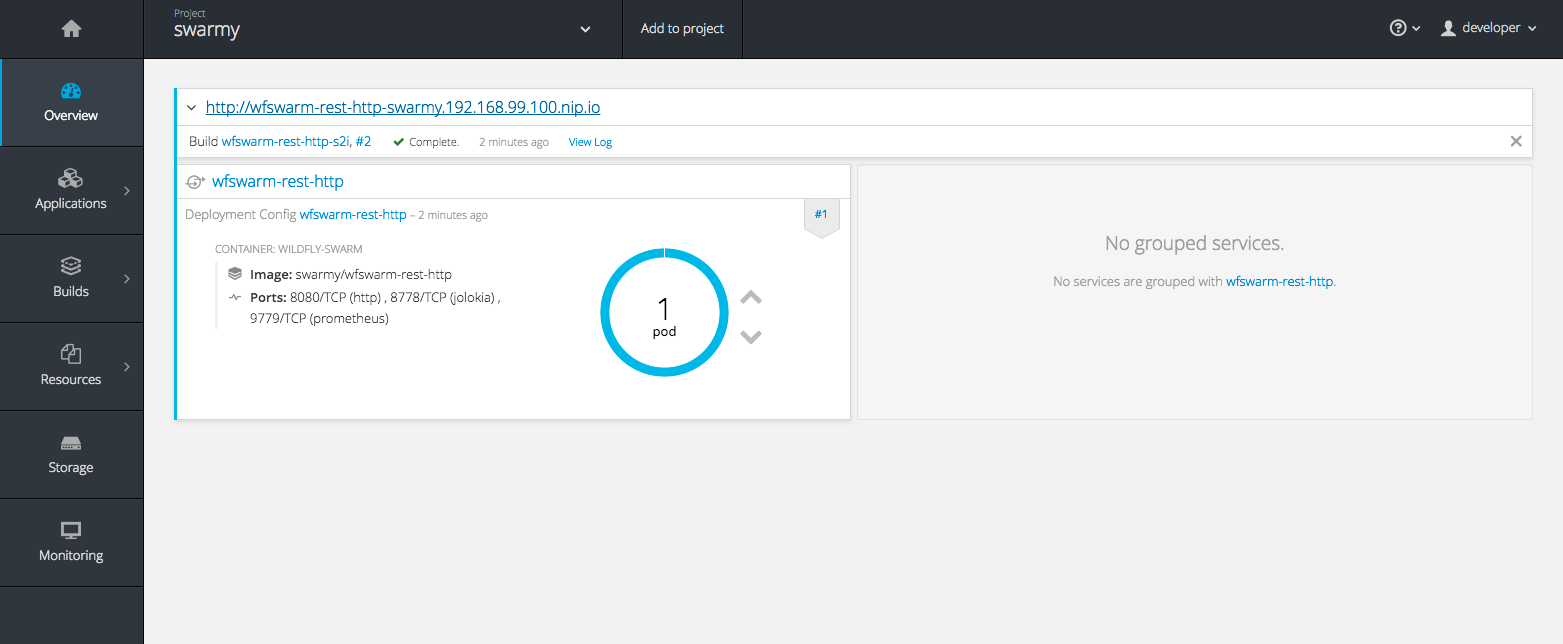
The Openshift Web Console will also look like similar to this:
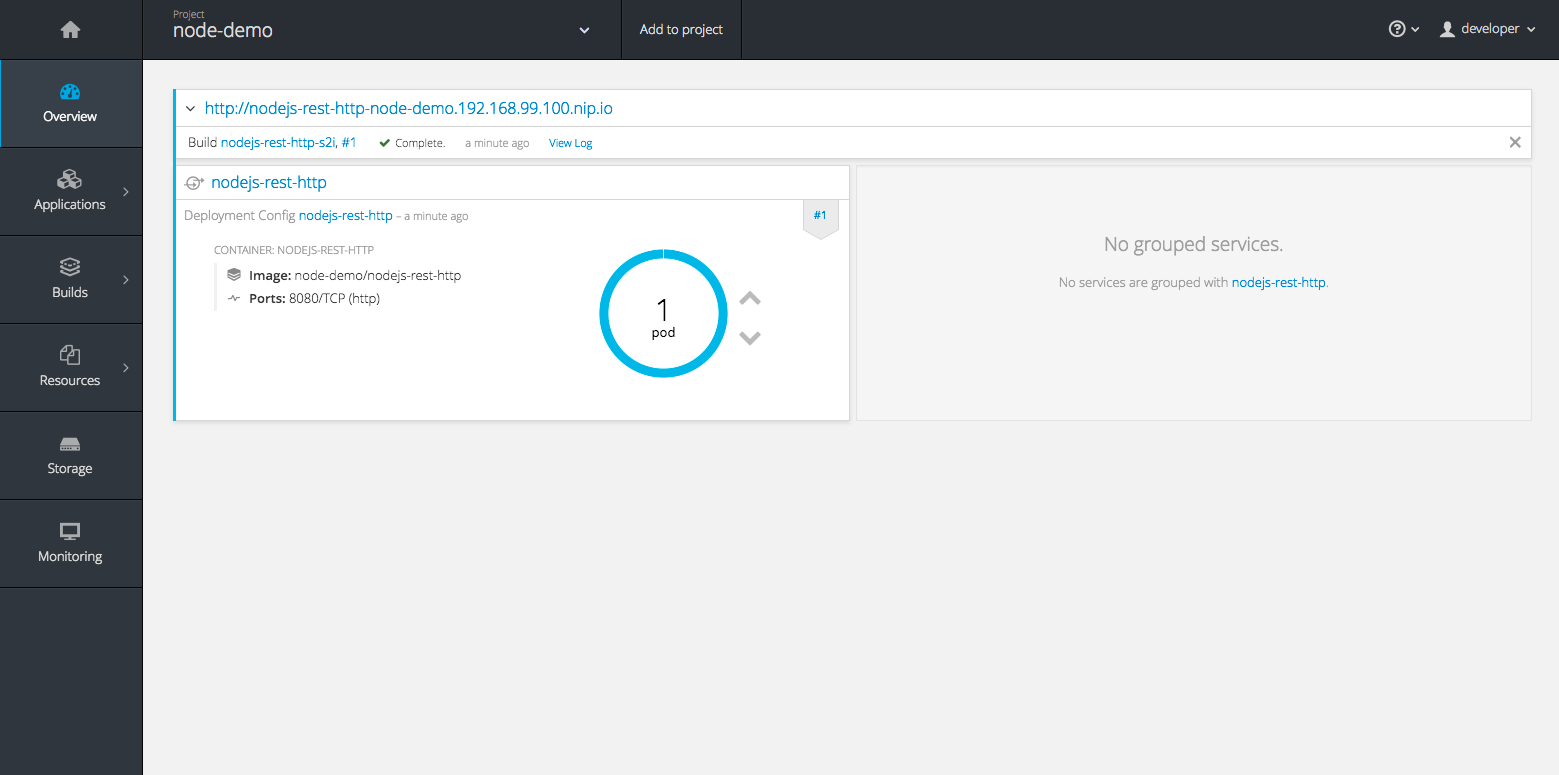
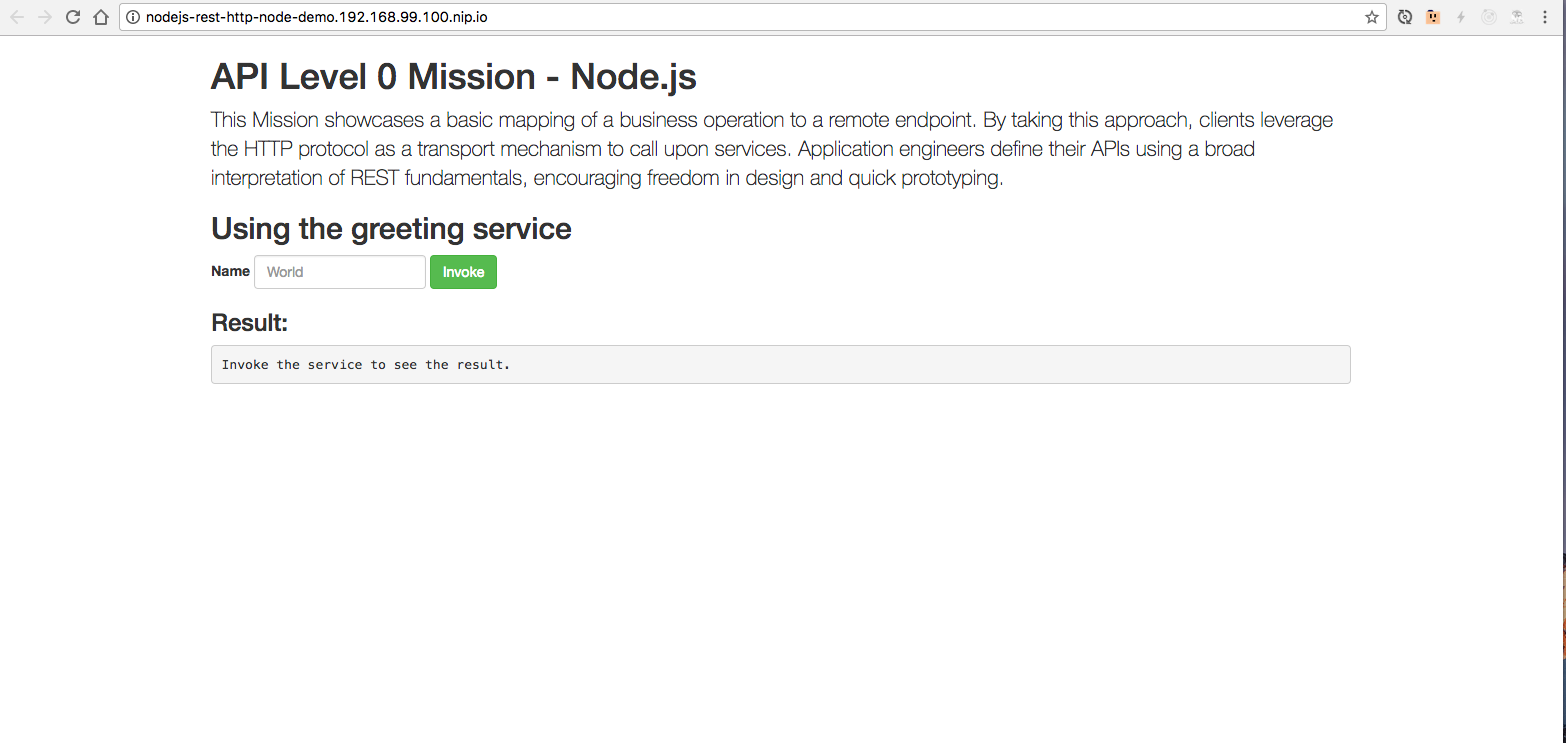
Clicking on that URL(which is a Route), will bring you to the sample app UI we saw earlier:
Going Behind The Curtain
You might think nodeshift is doing straight up magic, but i assure you it isn’t. Lets take a little look behind the scenes to see what is actually happening.
Lets do this step by step.
npm run openshift
This should be familar to anyone that has used Node in the past. It just runs the nodeshift command with optional options. We are running it with the “osc.StrictSSL=false” options. “osc” stands for “Openshift Rest Client” which is responsible for connecting the REST API’s. This options basically tells the Request Module, which the Openshift Rest Client is using, to not worry that we are using a self-signed certificate.
Authentication and Context
The next thing that nodeshift does, is to load your minishift configuration. It uses a small library “Openshift Config loader” to do this.
By default, nodeshift(well, the openshift-config-loader module) will look at your ~/.kube/config file by default.
This config file has some really neat information in it. It has an access token, which as you might have guessed is used for authentication.
If you want to see what your token is, you can use this command:
oc whoami -t
It also has the current project context you are working in.
Remember when i said, “Lets also create a new Project to run our app in. You also do this with the oc commands”. Thats how your current project context is set. You could also change it with:
$ oc project EXISTING_PROJECT_NAME
So with that knowledge, nodeshift moves on.
Packaging and Uploading
Then, it will look for a package.json relative to the current directory you are running the nodeshift command in. Yes, there is a way to tell nodeshift to look at another directory, but don’t be a jerk.
Nodeshift then will package up(create a .tar) of your source code in that directory. Actually, nodeshift will look at your package.json and if there is a files property, will just package those files/directories specified. If there is no files prop, then the currently directory is packaged up.
It then creates an Openshift BuildConfig and an ImageStream. The ImageStream will use the latest s2i docker image from here: https://hub.docker.com/r/bucharestgold/centos7-s2i-nodejs/
Your packaged source code is then uploaded to your cluster, where an S2I build is run.
If we were to look at our Web Console, click on Builds -> Builds on the left navigation, and then click on the first build in the list, we see this:
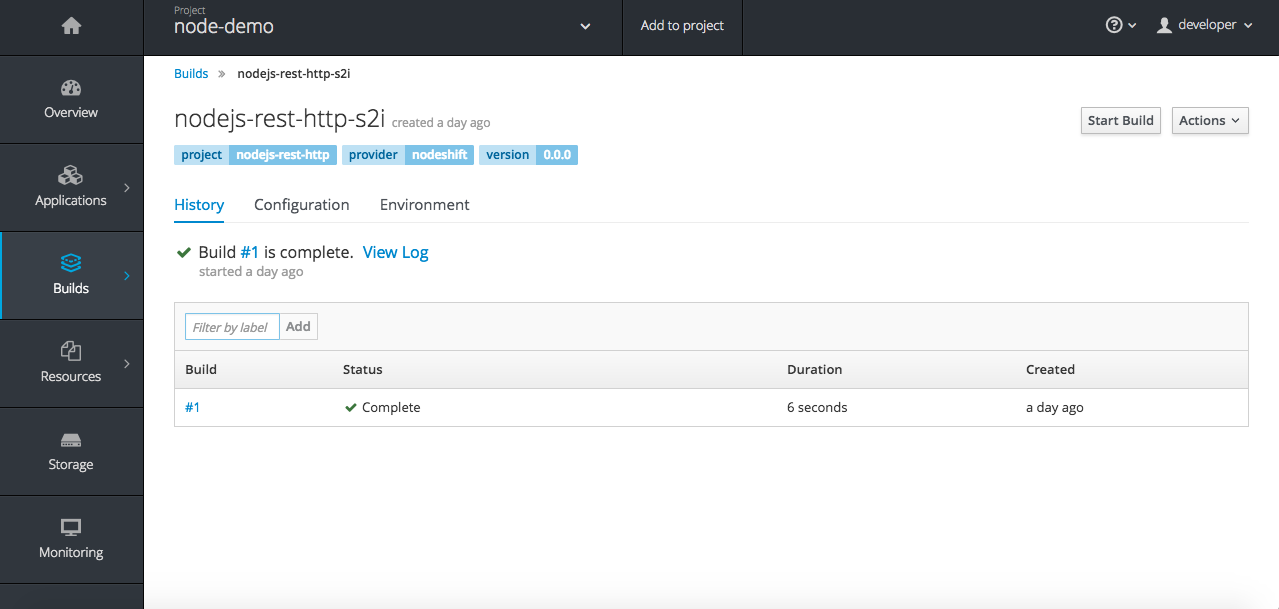
The name nodejs-rest-http-s2i is our BuildConfig and the #1 shows that we actually did a build.
If we were to view the log, It would look similiar to the blueish/purpleish part of our console log from before.
The result of this build is a Docker image, which we can see if we go to Builds -> Images:
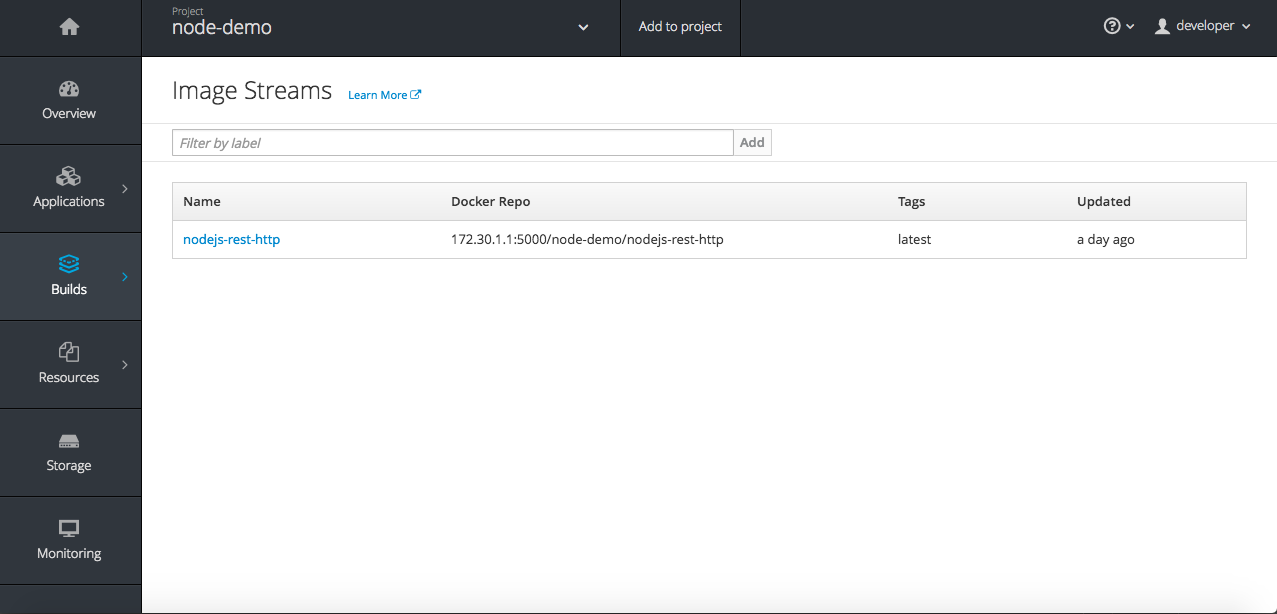
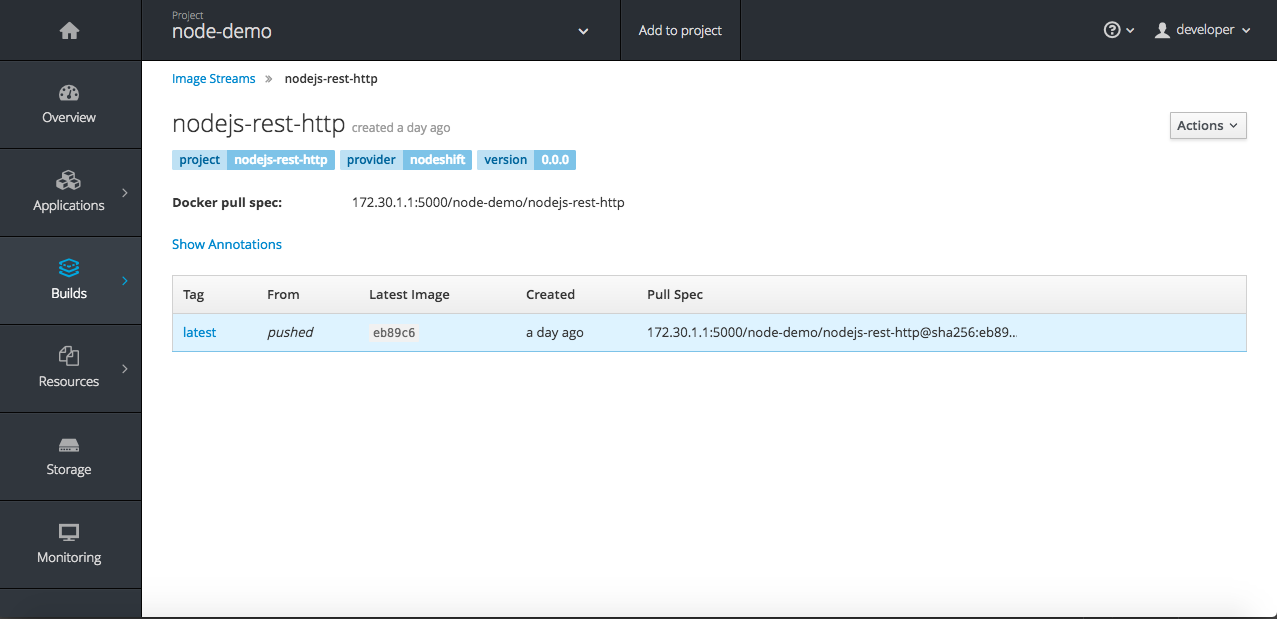
That entry, is our ImageStream config that nodehshift created for us. Then, if we click the entry, we should see some docker tags:
At this point, nodeshift hasn’t deployed your application(by deploy i mean, started running it), it has only created a docker image.
Deploying
Now that we have a docker image of the code on our remote host(minishift), we need to then get our code to run so we can access our application.
Once the build has completed, nodeshift will then look for a .nodeshift directory relative to your code. This directory should contain any “resource files”/”application descriptors” or whatever you want to call them, in .yml format
Basically, these files will tell Openshift, “Hey, heres my app, it needs to run on this port, and you should expose it. Oh and by the way, you should probably listen out for when that Image that i just created gets created again, because thats going to have new code in it, so make sure you run this deployment again”
Of course there is a little more to it than that.
You are going to need 3 files in this directory. These will create a “Service”, a “DeploymentConfig” and a “Route”.
These files have a minimal amount of information in them, since Nodehshift will “enrich” them. The maven plugin uses this term, i don’t reall care for it, but i’m not sure what else to call it. Maybe post something in the comments?
I’m not going to go to in depth on what each of the things are, but here are the definitions from the Openshift Docs
Service
"Service is a named abstraction of software service (for example, mysql) consisting of local port (for example 3306) that the proxy listens on, and the selector that determines which pods will answer requests sent through the proxy."
I think this is sort of like the -p 8080:8080 of a docker run command.
Deployment Config
"Deployment Configs define the template for a pod and manages deploying new images or configuration changes. A single deployment configuration is usually analogous to a single micro-service. Can support many different deployment patterns, including full restart, customizable rolling updates, and fully custom behaviors, as well as pre- and post- deployment hooks. Each individual deployment is represented as a replication controller.

A deployment is "triggered" when its configuration is changed or a tag in an Image Stream is changed. Triggers can be disabled to allow manual control over a deployment. The "strategy" determines how the deployment is carried out and may be changed at any time. The latestVersion field is updated when a new deployment is triggered by any means."
Routes
"A route allows developers to expose services through an HTTP(S) aware load balancing and proxy layer via a public DNS entry. "
This basically lets you get access to your service through a web address for example.
Coming Next
The POC i did just scratches the surface of the functionality that the Maven plugin does. It would be nice if we didn’t need all those resource files and nodeshift infered somethings. Also, this is very Openshift specific, it would be cool if we could also do straight up Kubernetes also.(not that i know what that really means, but it would be cool)
I’ve started to create issues here: https://github.com/bucharest-gold/nodeshift/issues on what is coming next.
I also have a short Youtube video of Nodeshift in action for those who don’t like to read, but if you’ve made it this far, then you had to read the whole blog, so the jokes on you :)
Make sure to like and Subscribe to the video :) , I have 2 subscibers and i need to get more than my 11 year old nephew, who, at the time of this rant, i mean writing, has 261
I usually end with a random cat pic, but we just had to put our cat of 13 years asleep, so this is him, Otter